

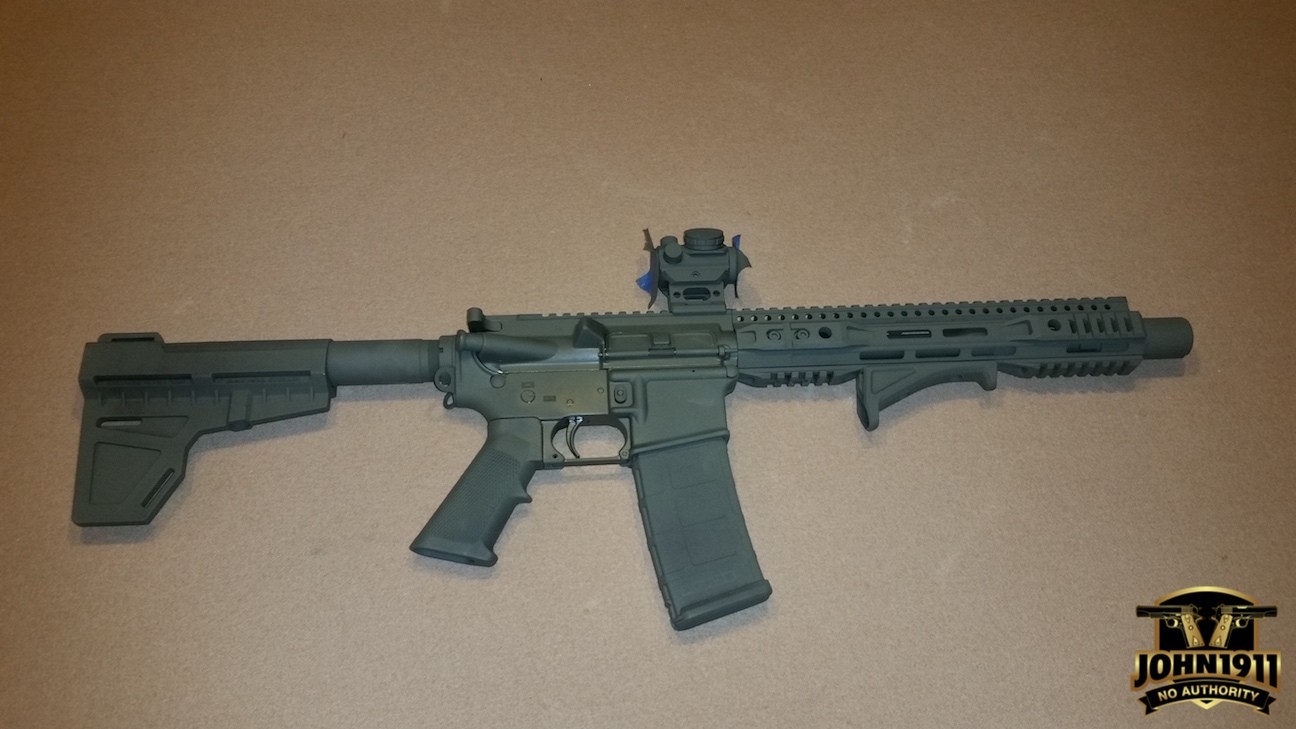
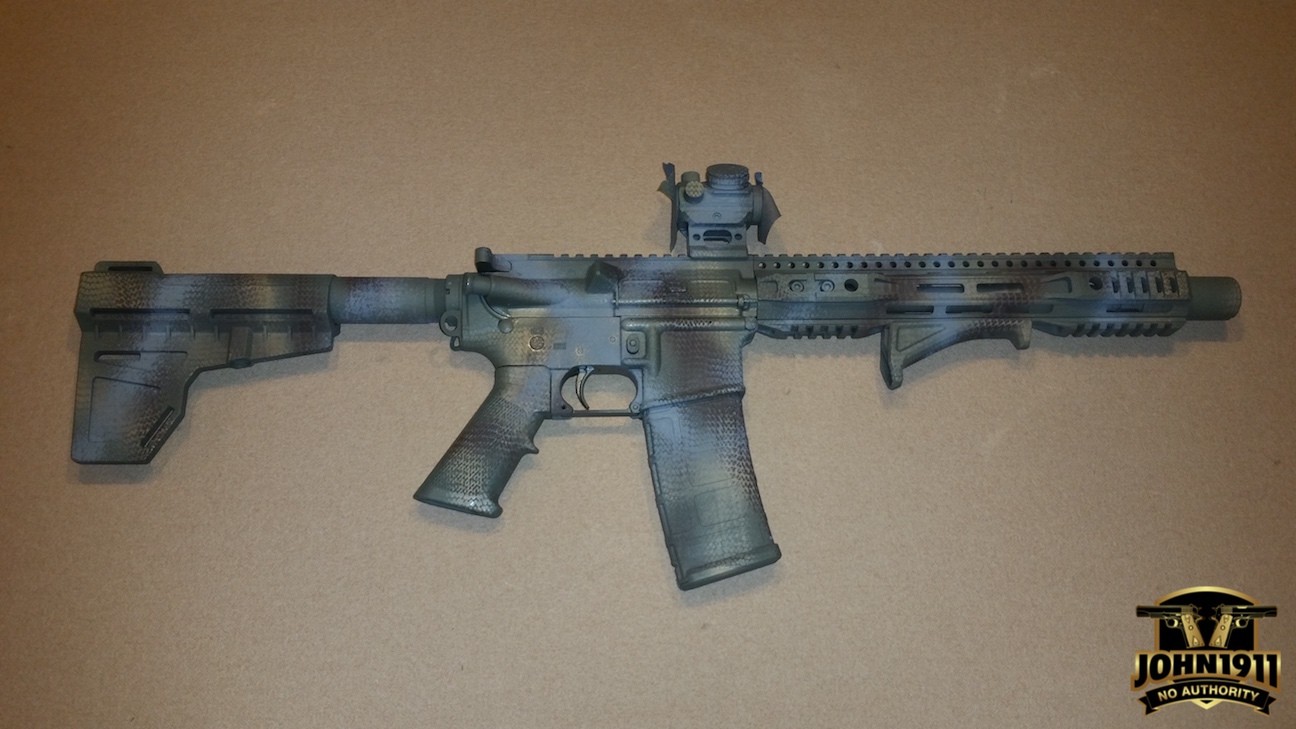
Since the AR pistol build is complete I decided it needed a paint job. Well…it didn’t need one, but I kind of wanted to put one on it. I’m a huge fan of painting my guns. Since this isn’t a hunting gun or anything with a specific purpose, I decided to play around a bit.
The first thing I did was look at my paint shelf to see what I had on hand. I picked out four colors that I felt would work. Then I started rummaging around for something to use as a stencil or pattern.
The great thing about DIY camo jobs is you can pretty much use anything and it will turn out nice. After considering and disregarding several items; I came across a roll of rubber shelf liner. I liked the pattern and decided I would give it a shot.
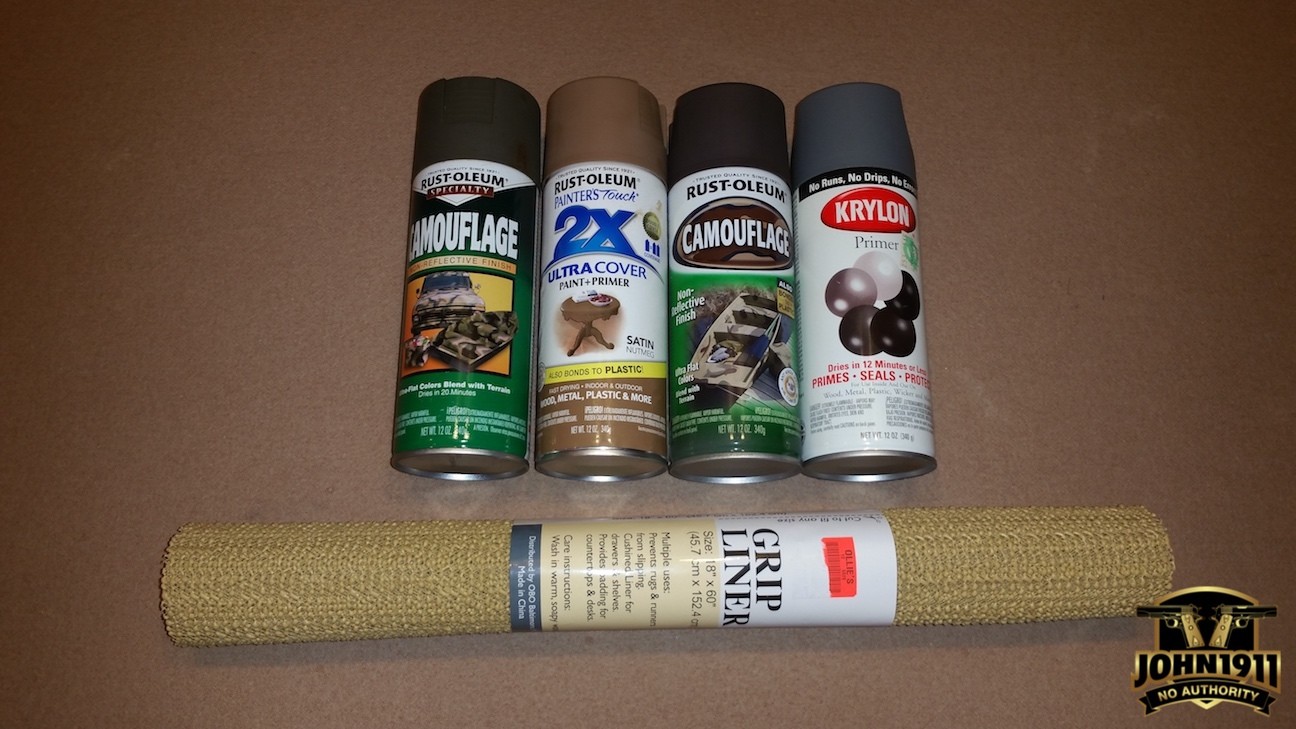
Step 1- Put down a base coat using Rust-oleum Forrest Green.
Step 2- Wrap the shelf liner around the pistol and use spray Rust-Oleum Flat Tan for random stripes. I went heavy and covered a lot since this was layer #2.
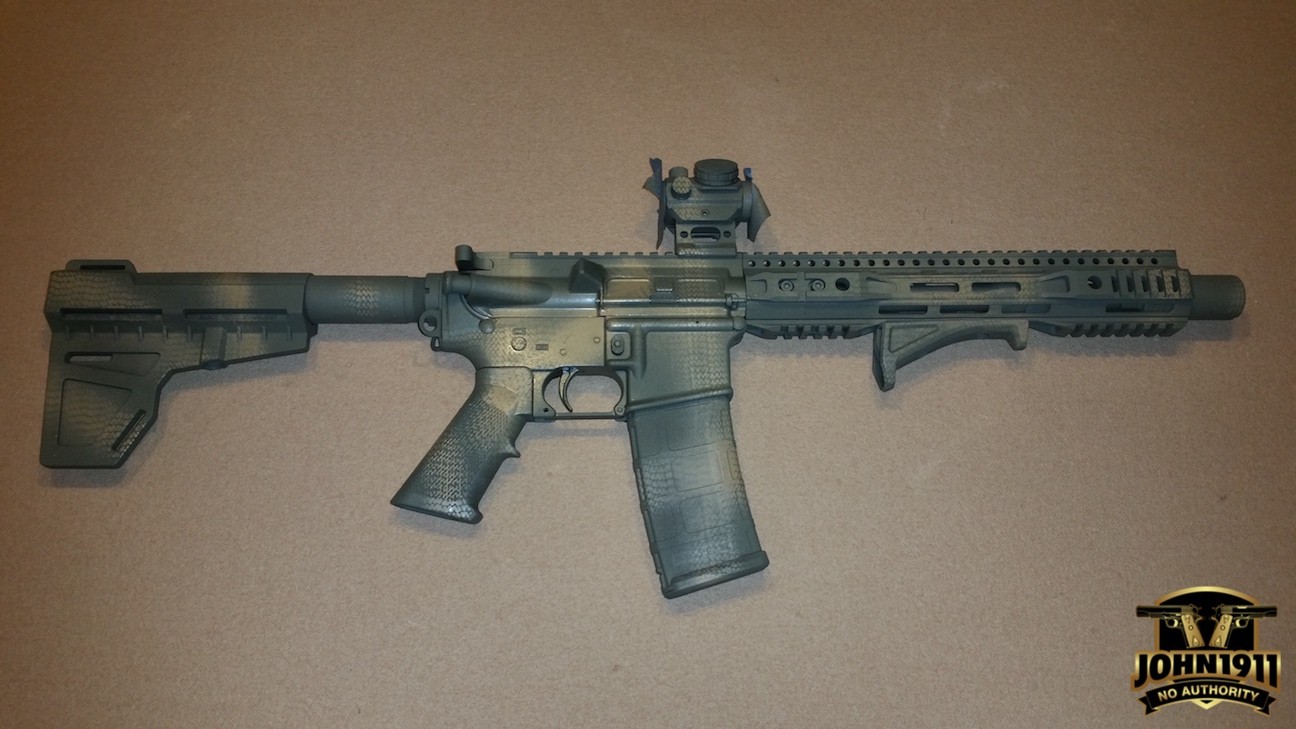
Step 3- I selected Flat Brown for my 3rd layer. Again using the shelf liner for pattern, I sprayed random stripes on the gun. Not as heavy as the 2nd layer but still ample.
I’m going to say that there is no right, or wrong, way to do this. You just have to play around. And if you don’t like the results, it’s easy enough to strip it off and start over.
Step 4- Selected Flat Grey primer for my last layer. I did it this was because wanted lighter highlights over the darker colors.
Once it dried, I inspected it. And it looked pretty good to my eyes. If you have never done a camouflage finish, you may look at it and think to yourself, “Something doesn’t quite look right”. And you will be correct!
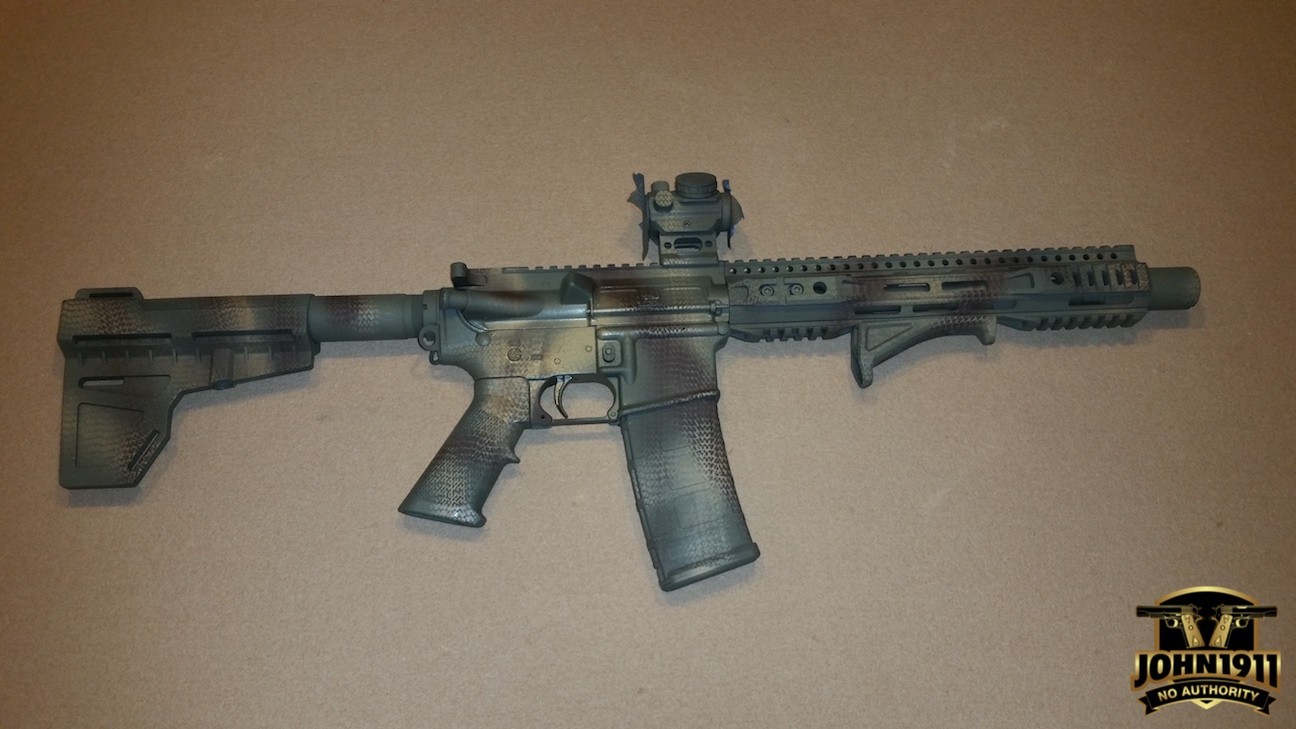
Enter the clear coat.
Step 5- Apply a clear coat. The clear coat actually blends the different colors and makes it work and look great. For most purposes you would use either a Flat clear or at least a satin clear.
On this application I actually used Gloss. I did it for two reasons. The first being, well….Lets just say… I was out of flat clear. And…gloss was what I had on hand.
The second is…since this isn’t a field gun; and more of a range toy, I figured, What the Hell!? If I don’t like it, I can always shoot a coat of flat over it later.
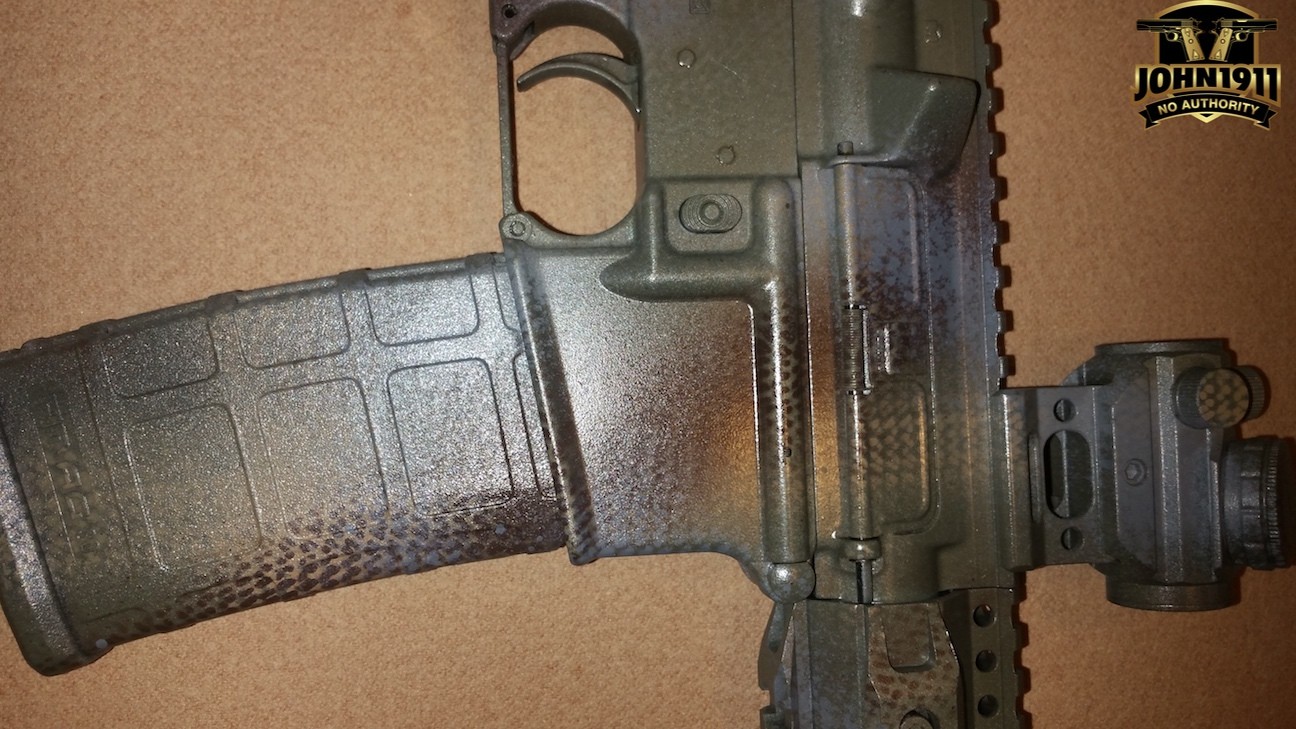
Personally, I like how it turned out. The colors blend well. And the pattern, while not obnoxious, looks pretty cool.
Just remember when you paint your guns, make sure you like the end result. And don’t worry about that others think. This is all about you and what you like.
You can’t mess it up. And for a few bucks of paint, the sky is the limit on what you can do.
Freeze
“Shooting Guns & Having Fun”
Freeze is our resident All-American hunter, shooter, gunsmith and military surplus collector. When he is not processing his own game or running the smoker, he focuses on Com-Bloc weapons and Black Powder Shooting.
- POTD – Giraffe Bone Grips - April 28, 2022
- Piebald Deer Sighted - February 9, 2022
- Dan Wesson 10mm Bruin 1911 - November 24, 2021


