

Markey has paid me some flattering comments on my gun photography, so I thought I’d share some tips with you that you can use when posting a gun for sale or just showing of your barbeque gat on Instagram.
First of all, you don’t need a fancy camera to take great photos–I used a basic Nikon CoolPix for these—but you do need to know some tricks to get great shots. Proper lighting is the most important thing. You can pick up a tabletop light box with lights for about $100, but those are usually too small for a long gun. You can also easily fashion one from fabric (I’ve used wedding dress material) and a couple of shop lights.
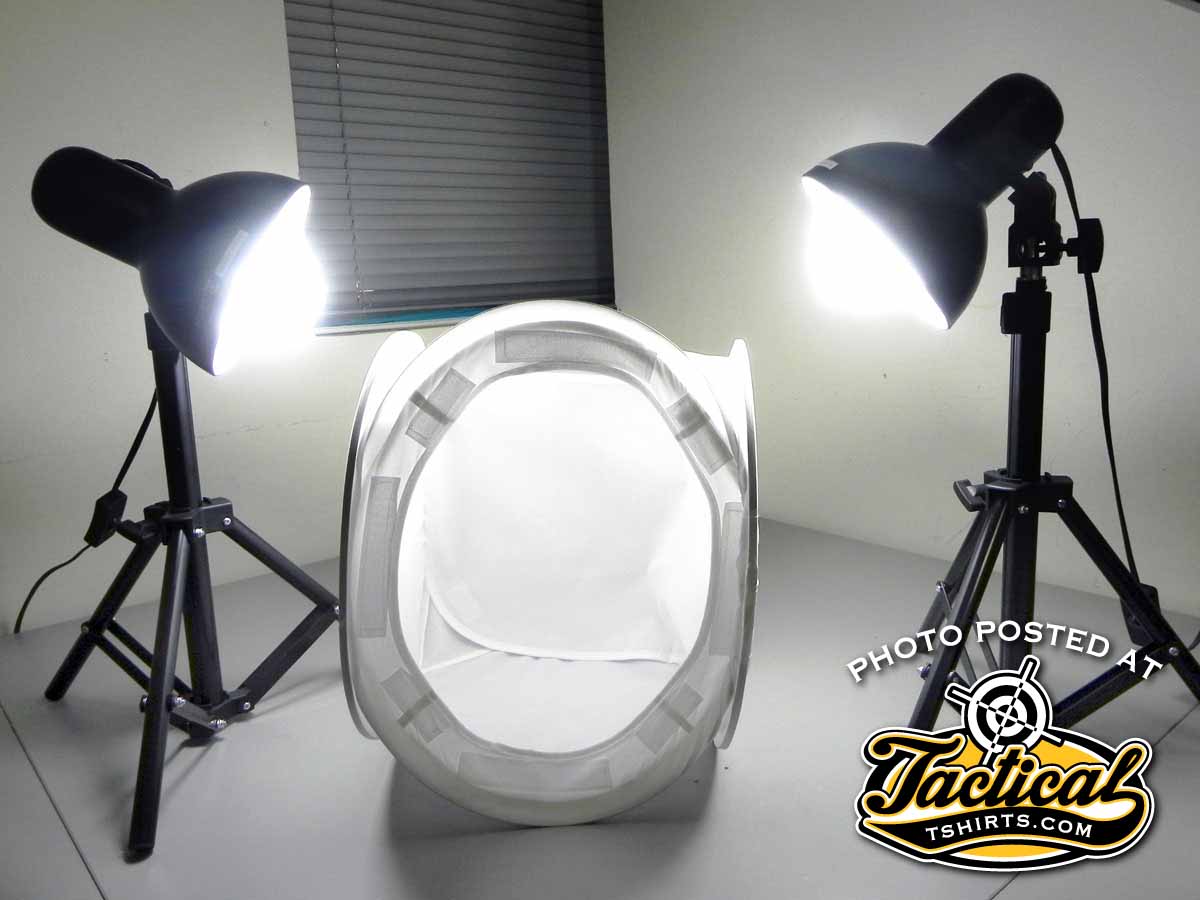
If you aren’t going to do a lot of photography, then it’s probably not worth it to set up a little studio. In that case, you can use good natural light by taking photos outside on a bright overcast day. You don’t want to take photos in bright sunlight because you’ll get harsh shadows, and you also don’t want to take photos on dark overcast days because the shots will be too dark and you’ll lose all of the detail.
Depending on what you’re photographing, you may or may not want flash. If taking a close up of a feature on a gun, flash is going to reflect harshly and blow out the shot. On the other hand, if you’re photographing someone shooting on the range where you’re back a few yards, use the flash to fill in all the shadows.
I prefer to use a white background because if you use a colored background, it casts a color bias on the gun and makes the gun’s color look off. That can be important if you’re selling an antique gun and want to really show off the bluing. Stainless steel guns also directly reflect the color, so stick with white.

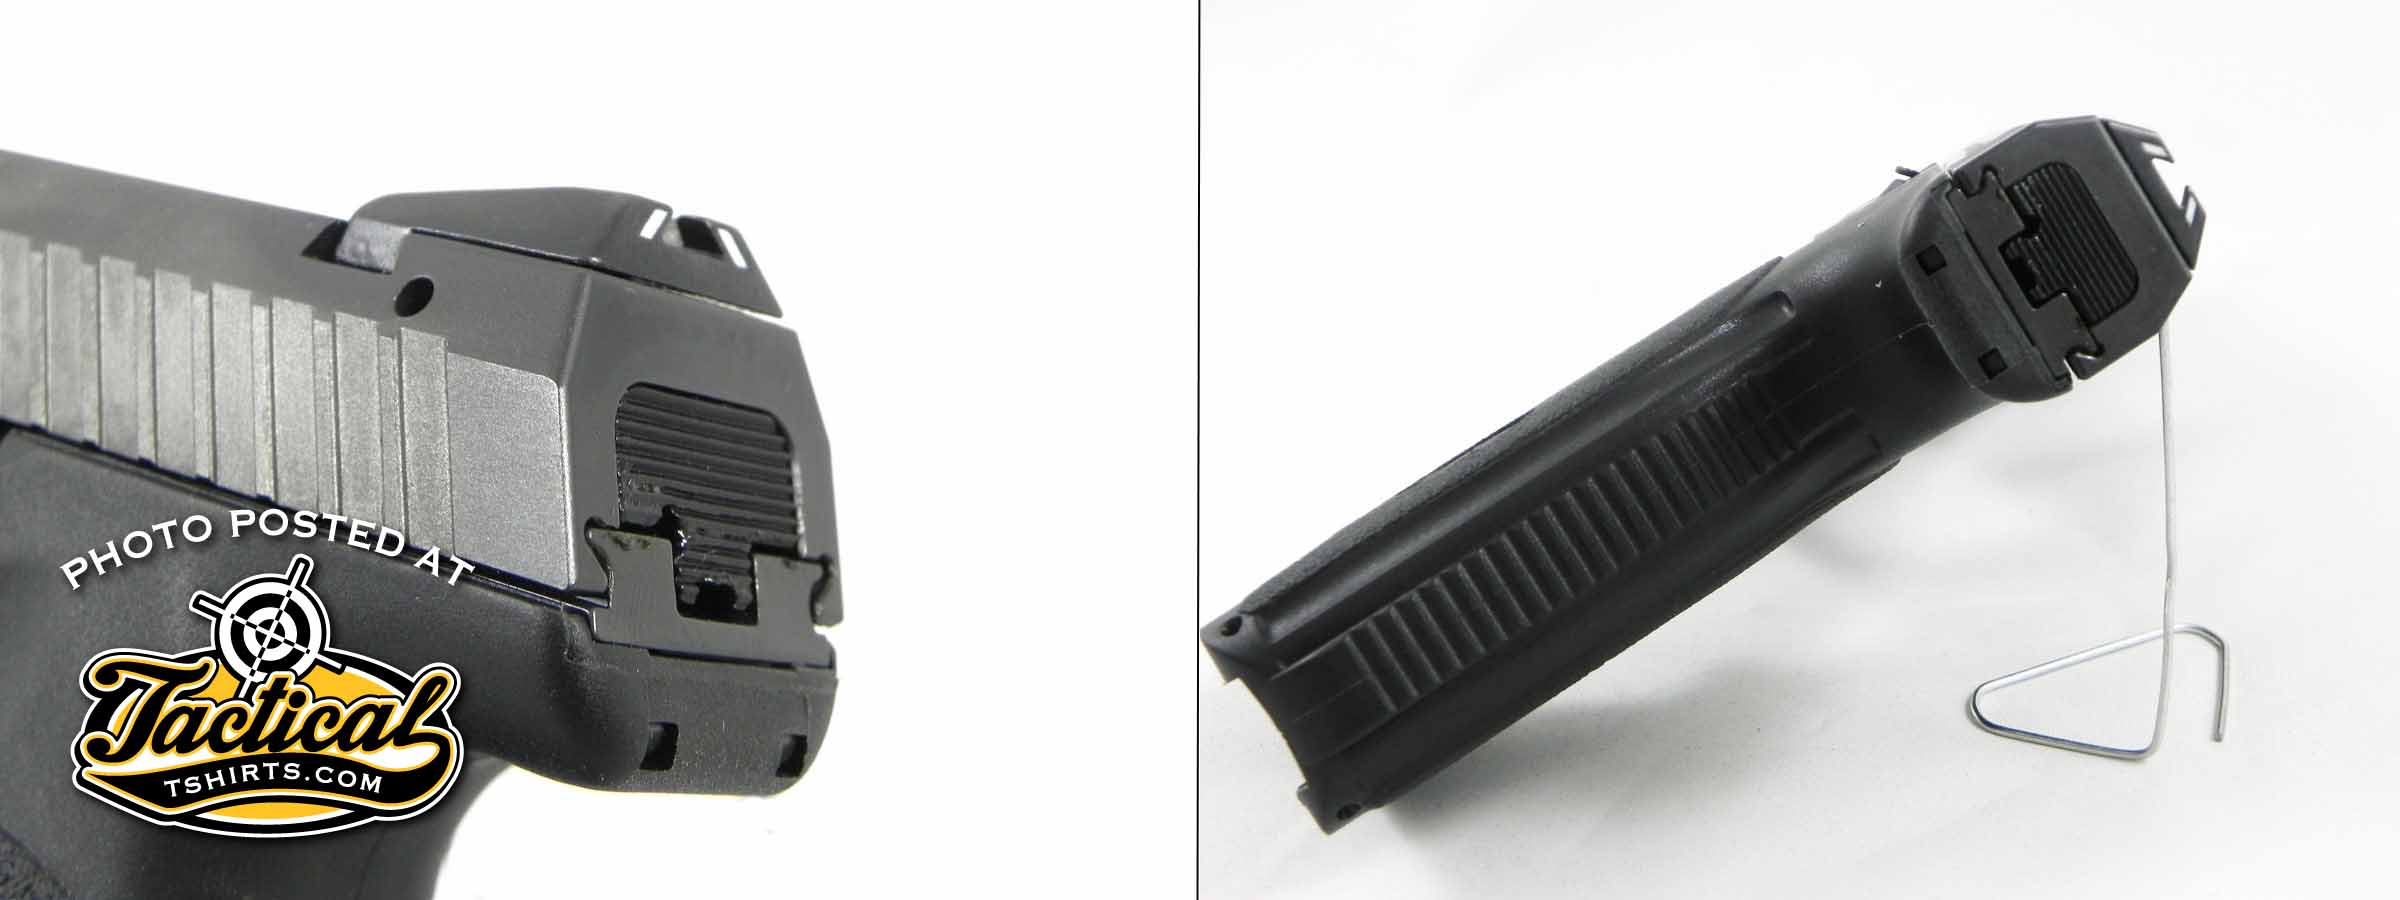
To really make the gun “pop” and have crisp edges, it’s best to get it up off the surface a little using a prop. If you leave it on the surface, you can get shadows and lose the edges. In the photos here, I used a bent paperclip and a chunk of Styrofoam to lift the gun. Props can be made of anything the right size, height and strength, but try to use something white if using a white backdrop, or something really thin or clear that’s not distracting.

If you’re taking close-ups, and we’re talking screw heads here, use the Macro setting on the camera. That’s the setting that looks like a flower. When set on Macro, many cameras have a range where it will focus. Go outside of that range, and you’ll have to back up defeating the purpose. If you still need to get closer and want a great image, get way back and use the zoom. By doing that, you get the subject in focus and the background blurs away.

Here’s the take-away—1) flat light, 2) get the gun off the surface, 3) use your Macro or zoom to really nail what you’re trying to show. Happy shooting.
Scott Mayer
www.tacticaltshirts.com
www.john1911.com
“Shooting Guns & Having Fun”

In 2008, Mayer returned to the editorial side of publishing, this time in the digital field, as Editorial Director for Guns & Ammo, Shooting Times, Handguns and Rifleshooter online magazines. After a brief stint in 2011 as the Digital Media Director for an ABC TV affiliate, Mayer returned to the outdoors industry and Safari Club International where he is currently Assistant Publisher and Multi-Media Communications Editor.
- CMMG Banshee & DefCan - April 13, 2018
- Cartridges Before There Were Cartridges - May 7, 2017
- Gas Rings Seal Test - April 17, 2017


